
Program Vs. Auto - IN THREE PARTS
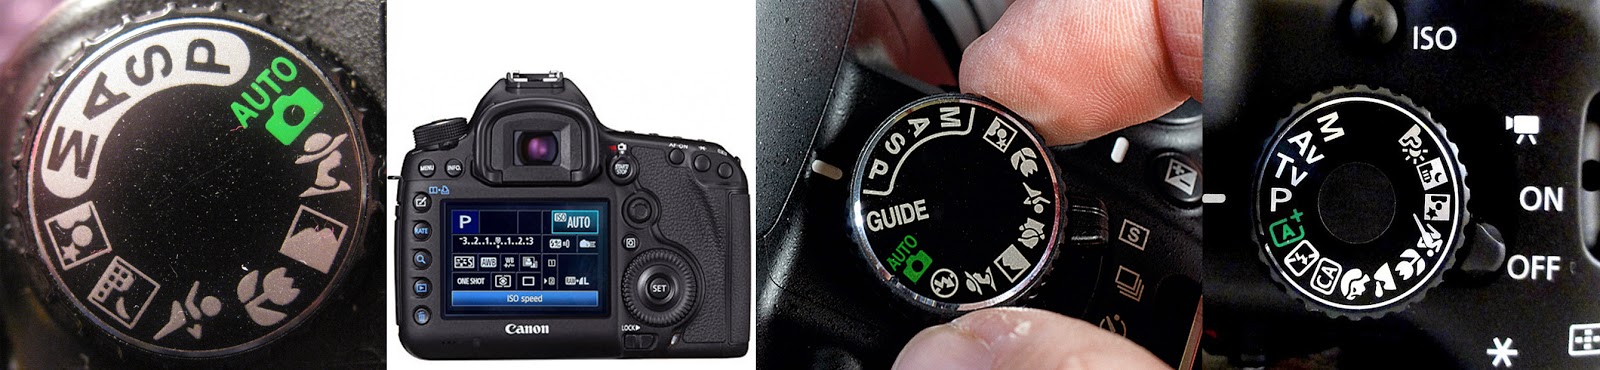
When I teach this is the most asked question. What is the difference between all of the modes on my camera. Well every camera is different, but they all have different modes. And most have an Auto mode and a P or Program mode. Often the auto mode is a green rectangle or a green camera on the dial where Program is simply a capital "P".
Where/What is the P mode and the Auto mode on my camera? Okay so see below - on the newer cameras you can see these modes and all your other pertinent info on the back of the screen (if you dont see it press the Q or display button on your Canon or Nikon) Or this info is on the dial. See below the auto mode is displayed differently but in all cases below is the green area - little camera, or rectangle with an A in it? That's your auto mode - and the P - right next to it or almost next to it is program.
Now what is the difference in these two? Not a whole lot, but sooo much! Okay loaded question, loaded answer. Auto, or as I call it when I teach "idiot mode" (which is not meant to be offensive, it is merely meant to indicate that you don't have to make any decisions and really are not allowed to make any choices in that mode) Is the green rectangle or camera or word Auto. It does everything for you - you literally point and shoot. Everything is automatic. Now in P or Program, you have some control. Not the kind of control you have in the other modes - (M, A, and S) but some. You are able to control 3 things-
ISO
Flash
Exposure compensation.
Okay terrific now do you know what those three things are?
Lets discuss.
ISO is short for International Standards Organization – the main governing body that standardizes sensitivity ratings for camera sensors. It’s a a term that was carried over from film. When you change your ISO setting, you’re adjusting your camera’s sensitivity to light. ISO settings can be anywhere from 24 to 6,400 (or higher), and these numbers have a direct relationship with the device’s sensitivity, so a lower setting makes it less sensitive and a high setting makes it more so. ISO is one of the three factors that determine your picture’s exposure. Finding the right balance between these three settings is key to getting the perfect shot.
Finding the right ISO setting
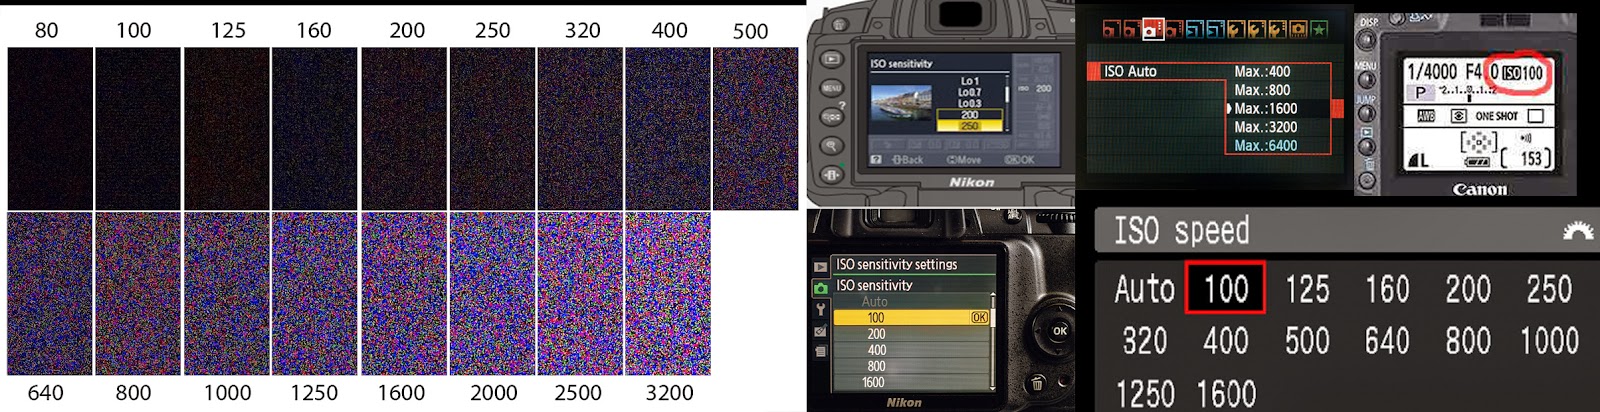
First of all, you should know that a higher ISO typically translates to a noisy or “grainy” image, so as a general rule you want to use the lowest setting possible for your photos. Check out the picture below to see the difference it can make.
A lower ISO will usually produce more color-accurate, aesthetically pleasing images, but there are situations where a higher ISO is desirable. The proper ISO setting really depends on the level of lighting you’re shooting in and the visual effect you’re going for, so rather than relying on one over-arching rule, consult this list of tips:
- If your subject is moving and you’re trying freeze the motion for a still, you’ll likely need a higher ISO setting to compensate for the high shutter speed and ensure your image gets enough light
- If you’re going for more of a vintage aesthetic and want to add a little bit of grain to your photos, don’t be afraid to bump up the ISO a few notches
- If you’re using a tripod to stabilize your camera you can usually get away with a slower shutter speed, which in turn allows you to use a lower ISO
- If you’re shooting an image that doesn’t require a large depth-of-field, you can increase the camera’s aperture (thus allowing more light into the lens) and use a lower ISO
- If you’re shooting with artificial light (i.e., using a flash) you can typically get away with a lower ISO setting
You’ll probably need to experiment a bit until you hit the sweet spot, but while you tinker with settings, keep the following in mind:
- Never trust your camera’s display. Don’t assume that your picture will turn out just because the tiny 2-inch preview looks adequate. Your shots almost always look different on your computer, and you probably won’t be able to spot noise on your camera’s small, low-resolution display. For this reason, we highly recommend that you zoom in a bit to check your images for grain. There’s nothing worse than taking a bunch of seemingly great shots only to discover they’re noisy and speckled when you upload them to your PC.
Speaking of display - where do we find the iso settings? Below we have both Nikon and Canon screens pictured. In most situations, you can change the ISO in three places - on the screen on the back of the camera - the shooting screen if you have one, the menu in the interior of the camera, and the ISO shortcut key (found on the back of your canon camera)
In part two we will talk about Flash!
Let me know if you want to inquire about private lessons or the like. Sometimes this stuff is easier to learn one on one and hands on.
No comments:
Post a Comment